Intro
I have been working on an open source project called Project Tetsuo. Part of getting serious about it is doing some of the scaffolding that open source projects have. In this post, I’ll talk about working through the process of making signed commits to my codebase.
Why
Essentially a signed commit is a commit that has been cryptographically signed and validated. This is a good thing to do. It gives people confidence that the commit has come from an authenticated source. In other words, it’s me that made it.
As part of some hygiene around the project, we decided to implement signed commits.
What now?
In order to get signed commits working you need to follow a few simple steps. This looks like a lot but really isn’t.
Generating a GPG key
The first step is to generate a new key. I’m going to use a GPG key for this part.
# gpg --full-generate-key

# gpg --list-secret-keys --keyid-format=long
When IU list the key on my system, I get the following output:
pubring.kbx
------------------------
sec   exxxxxx/XXXXXXXXXXXXXXXX 2023-02-28 [SC] [expires: 2024-02-28]
      XXXXXXXXXXXXXXXXXXXXXXXXXXXXXXXXXXXXXXXX
uid                 [ultimate] Scott van Kalken (KEY BABY) <XXX@gmail.com>
uid                 [ultimate] Scott van Kalken (github tetsuo key) <XXX@gmail.com>
ssb   XXXXXXX/XXXXXXXXXXXXXXXX 2023-02-28 [E] [expires: 2024-02-28]
This tells me the ID’s of my secret key as well as the emails that have been associated with them.
Associating an email address
The next step in the process is to add an alternate email address to my key. I do this so that I can use multiple configurations for a single key.
In order to do this, I list out the key, just like the previous steps, then I perform an edit operation using GPG. Once I’ve done that I can save the key and I have added a secon email address to my key.
# gpg --edit-key XXXXXXXXXXXXXXXX
gpg (GnuPG) 2.3.4; Copyright (C) 2021 Free Software Foundation, Inc.
This is free software: you are free to change and redistribute it.
There is NO WARRANTY, to the extent permitted by law.

Secret key is available.

sec  eXXXXXX/XXXXXXXXXXXXXXXX
     created: 2023-02-28  expires: 2024-02-28  usage: SC
     trust: ultimate      validity: ultimate
ssb  XXXXXXX/XXXXXXXXXXXXXXXX
     created: 2023-02-28  expires: 2024-02-28  usage: E
[ultimate] (1). Scott van Kalken (github tetsuo key) <xxxxxxxxxxxxxx@gmail.com>

gpg> adduid
Real name: Scott van Kalken
Email address: xxxxxxxxxxxxxx@gmail.com
Comment: KEY BABY
You selected this USER-ID:
    "Scott van Kalken (KEY BABY) <xxxxxxxxxxxxxx@gmail.com>"

Change (N)ame, (C)omment, (E)mail or (O)kay/(Q)uit? O

sec  eXXXXXX/XXXXXXXXXXXXXXXX
     created: 2023-02-28  expires: 2024-02-28  usage: SC
     trust: ultimate      validity: ultimate
ssb  XXXXXXX/XXXXXXXXXXXXXXXX
     created: 2023-02-28  expires: 2024-02-28  usage: E
[ultimate] (1)  Scott van Kalken (github tetsuo key) <xxxxxxxxxxxxxx@gmail.com>
[ unknown] (2). Scott van Kalken (KEY BABY) <xxxxxxxxxxxxxx@gmail.com>

gpg> save
Telling git about my key
The next step now that I have my public key is to list it out again so that I can get the key ID, then configure git to use it. The git config value is user.signingkey.
You will note that I additionally unset the format of the git signing key. This is because the default format of git signing keys is openpgp. As we are using a gpg key, we need to remove this default value.
Info
Trap for young players - remember to unset the default key! :)
# gpg --list-secret-keys --keyid-format=long

# git config --global --unset gpg.format
# git config --global user.signingkey XXXXXXXXXX
Add the key to my github account
The next part is where I add the key to my github account. This let’s github know about the key. First I need to get the key into a format that github accepts.
In order to do this I run the following commands:
# gpg --list-secret-keys --keyid-format=long

# gpg --armor --export xxxxxxxxxxxxxxxx
XXXX in this case is the ID of the key from the list secret keys command above.
This should give me something like this:
-----BEGIN PGP PUBLIC KEY BLOCK-----
STUFF IN HERE
-----END PGP PUBLIC KEY BLOCK-----
In order to place this into my github account I do the following:
First I click on the settings menu on the top right of my github account.

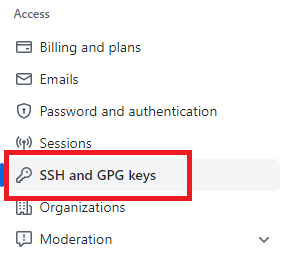
Next I need to click on the SSH and GPG keys menu on the left hand side of the screen. This will take me to the SSH menu.
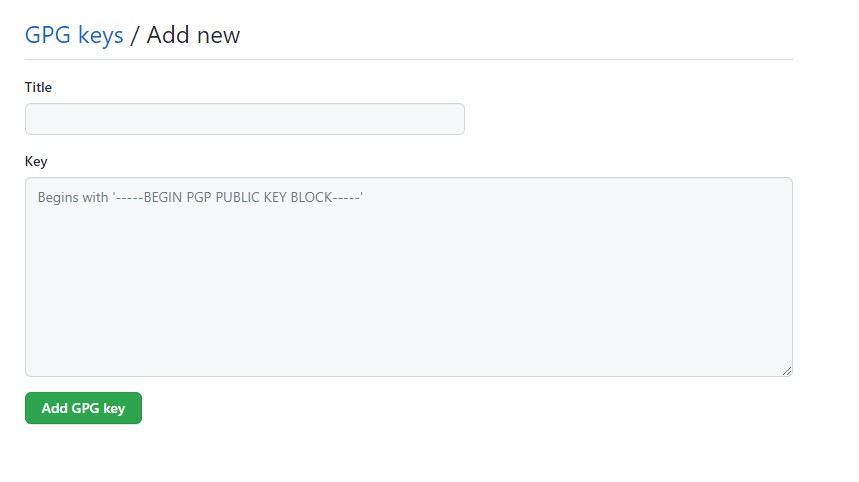
Now I click on the green button new key

This will bring up the screen where I can paste my key in. Remember the command above where we exported the key and got the begin and end public key block header and footer? This is what you paste into the box. It must include the header and footer.
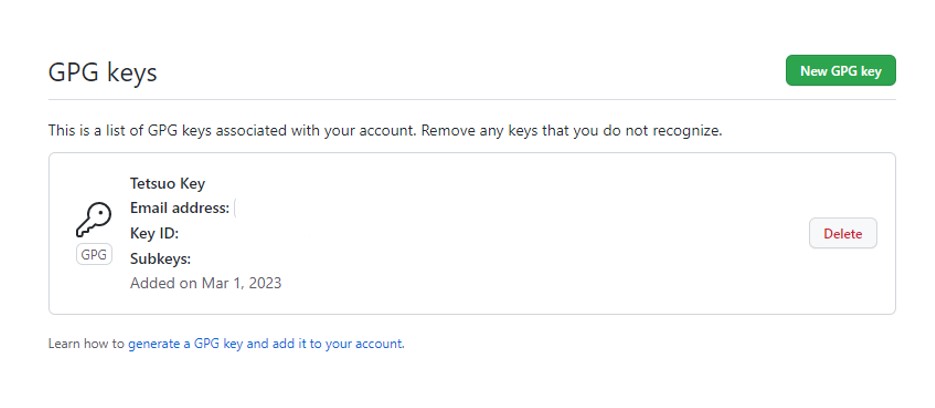
Once I’m done, you should see a new GPG key added to your account!
The end result
The end result is super cool. I now have signed commits in my repository. All I need to do is add the -S for signing. I can make this a default if I want by setting commit.gpgsign true in my github config using the following command
# git config --global commit.gpgsign true
In my case as I work on some projets that require signed commits and some that don’t I decided not to do this. In my case, I will simply use the dash capital S instead.
# git commit -S -a -m "testing signed commits"
[rel-0.6 0e2cd3e] testing signed commits
 1 file changed, 2 insertions(+)


# git push
Enumerating objects: 7, done.
Counting objects: 100% (7/7), done.
Delta compression using up to 2 threads
Compressing objects: 100% (2/2), done.
Writing objects: 100% (4/4), 503 bytes | 19.00 KiB/s, done.
Total 4 (delta 1), reused 0 (delta 0), pack-reused 0
remote: Resolving deltas: 100% (1/1), completed with 1 local object.
To https://github.com/project-tetsuo/project-tetsuo
   a30eef4..0e2cd3e  rel-0.6 -> rel-0.6
When I look inside my github account at this particular commit I see the following.

One last thing
One last thing is that to make this work repeatably on every login, you may need to add your terminal to be the GPG_TTY.
export GPG_TTY=$(tty)
This sets the current terminal you’re using to be the correct terminal for GPG to use. Place this in your login .profile or .shell_profile (whichever shell you use) so that it’s automatically set for every login.
Conclusion
This is a really easy thing to do, and it’s just another way of making sure that committed code comes from the person who you think it does. While the post is really long, it actually only took me about 10 minutes to get everything set up and tested.
I really recommend setting up signed commits, or at least playing with them so that you’re aware of how they work and also aware that it’s an option for future projects you work on.